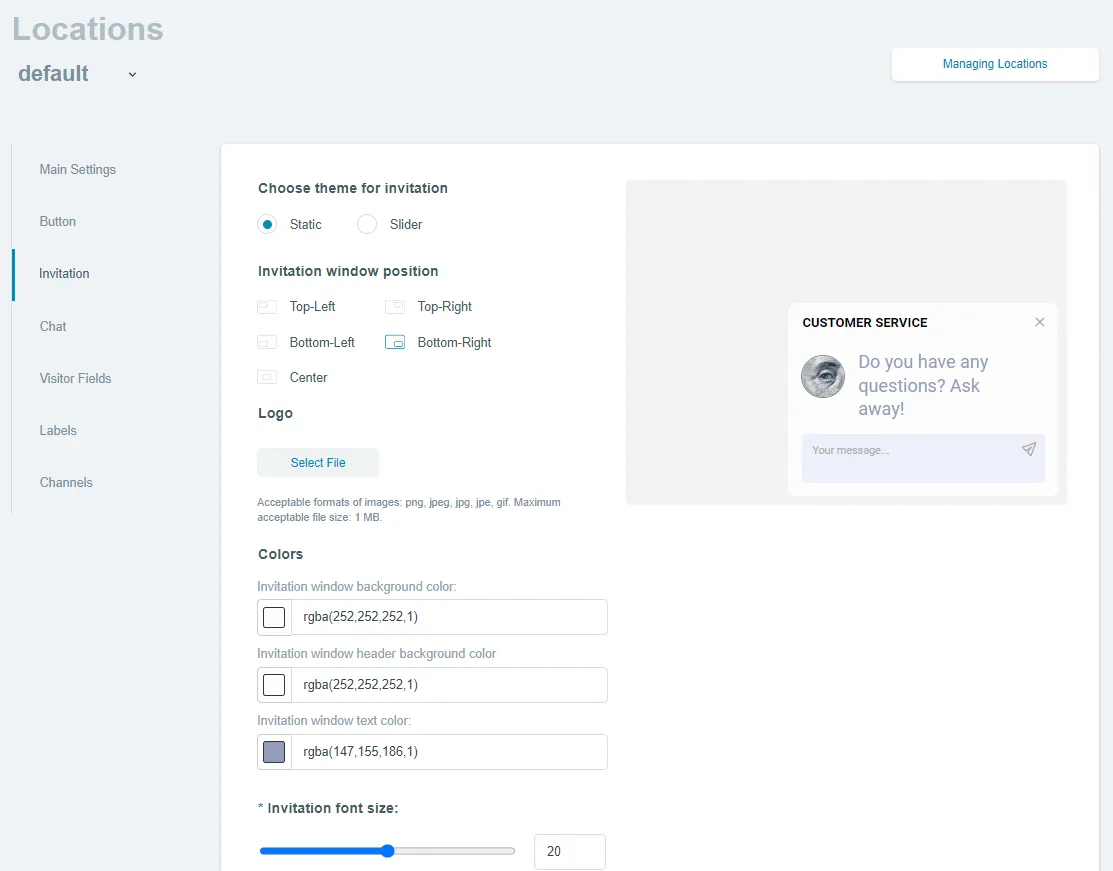
"Invitation" Section
In this section of the Buttons and Locations settings item you can customize the appearance of the auto-invitation that the client will see, namely change:
-
Choose theme for invitation: Static - fixed in one place; dynamic - moves around the screen, not fixed
-
Invitation window position: bottom right, top right, top left, bottom left, center.
-
Logo: Click Select File to open the Open dialog box, where you can select a graphic file. PNG, JPEG, JPG, JPE, GIF formats are acceptable. The image size should not exceed 100x100 pixels. It is best to choose a photo of one of the agents. This image will be present in the upper left corner of automatic invitations, which will be displayed on the site when all agents are unavailable, and, accordingly, it is not clear which of them will process this request later.
If an image is selected, the file name will be displayed next to the button. If no image is selected, the default avatar will be displayed in its place:
You can always change the image to a new one.
To delete a previously saved image and revert to the default avatar, simply click on the Delete button next to it.
-
Invitation window background color: color, selectable from the palette or specified in RGBA format (white by default)
-
Invitation window header background color: color, selectable from the palette or specified in RGBA format (white by default)
-
Invitation window text color: color selected from palette or specified in RGBA format (default is black)
-
Invitation font size: changes the font size of the invitation.

