Step 3. Installing the Rox.Chat Widget on a Website
In this step, you will embed the HTML code of the Rox.Chat online consultant on your website. Once successfully embedded, the agent call button and/or chat invitation will appear on your website.
Implementing Rox.Chat is easy to do on any website on any platform, regardless of the programming and markup languages, CMS, or databases.
-
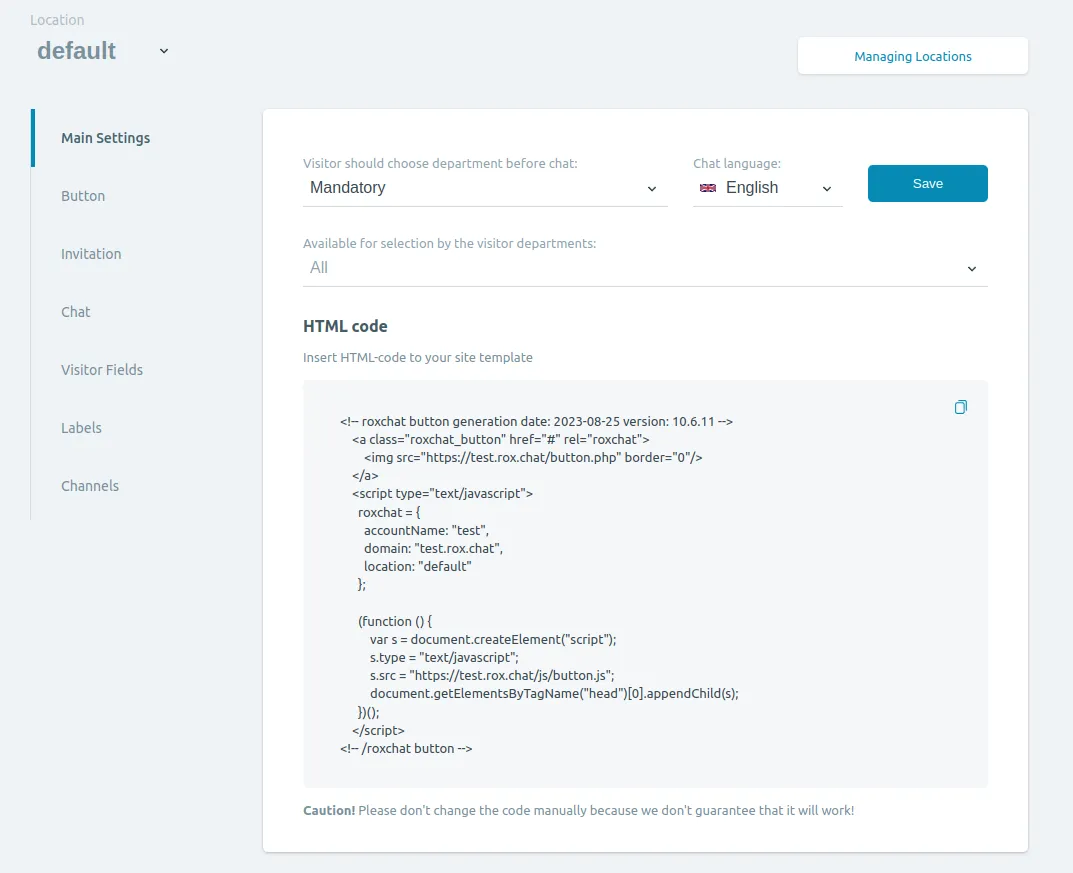
Select the HTML code prepared by Rox.Chat at Locations on the Control Panel page and copy it to the clipboard:
-
Open the code management tools of your website. You must have permission to edit web pages and/or templates.
-
If templates are edited via the control panel (for example, in WordPress), log in to the administration interface of the web site management.
-
If templates are edited by modifying template files in a special format (for example, in Django), log in to the project file storage and find the template files. We recommend creating a separate file for the Rox.Chat code and including it in templates using the include directive.
-
If HTML markup is edited directly in the web page code, open the web page files in the HTML editor.
-
-
Paste the code from the clipboard into the appropriate place of the template. We recommend placing the Rox.Chat code in a general template used on all website pages so you do it only once. Place the button code inside the body tag at the foot (prior to the closing tag).
-
Open your website in a browser, and check that the Rox.Chat button appears on website pages.
Your Rox.Chat online consultant is ready to go.
